Thursday, November 25, 2010

Sausage Bread


So I've made sausage bread for the weekend... One loaf for our house and one loaf for my dad's house (since they'll have company too).  Normally Sausage Bread starts with frozen bread dough, but since I am glutton for punishment, I decided to make my own dough in the bread machine. So here are the photos and instructions from the starting dough through to the finished loaves... This recipe is a combination of a bread recipe from Food.com and my own creation for the filler.   Enjoy!

Sausage Bread with Homemade Dough
 
***Bread Dough***
1 1/2 cups warm water
1 teaspoon salt
2 teaspoons butter
3 1/2 cups flour
2 teaspoons active dry yeast
***Sausage Filling***
2 lbs italian sausage (1 hot, 1 sweet)
1/2 cup chopped onion
2 lbs mozzarella, shredded
3 eggs
shredded Parmesan
Italian seasoning
Place all bread dough ingredients in bread machine and select dough cycle. When cycle is complete, remove dough, split into two and roll each into a 12"x15" rectangle on a lightly floured board.

Sausage, removed from casing, 1 lb hot, 1 lb sweet
Meanwhile, brown the sausage in a pan. When browned, add onion and cook an additional couple of minutes until softened. Drain excess grease from sausage and cool slightly. 

Browned and ready to go
Beat two eggs together and mix with the slightly cooled sausage. Spread 1/2 of the sausage mix on each of the dough sheets, sprinkle with mozzarella, then a little Parmesan and Italian seasoning and roll it up lengthwise, pinching the ends and seam to seal.

Ready for filling

Roll up lengthwise

Tuck in ends and press seams

Ready to bake

Place seam side down on greased baking sheet and allow to rest for 15 minutes.

Bake at 350° for 20 minutes. Meanwhile, beat remaining egg in a small cup. After 20 minutes, remove bread from oven and brush with egg. Sprinkle with more Parmesan and Italian seasoning and return to the oven for an additional 25 minutes or until dark golden brown.

YUM!

Cool loaves on pan for 15 minutes before serving or putting on a cooling rack to cool completely. If serving at a later time, make sure to refrigerate once cool and reheat before serving.

Wednesday, November 24, 2010

Buttery Potato Rolls

Ok, so here's the next installment of the Holiday Recipe Exchange recipes... Today, hot, buttery, potato rolls! This recipe is based on one that's been used in my family for many many years. It utilized leftover mashed potatoes and is just delicious. I usually keep some "instant" mashed potatoes in the pantry for just this purpose (well, this and my husband's great-grandmother's doughnut recipe!) 

This is a very versatile recipe which can be made into any shape from Parkerhouse to crescents to hamburger buns. It's also great with other things added either to the dough itself (like fresh herbs) or on top (think parmesan cheese, italian seasoning, etc.) Enjoy!


Come join the fun at the My Baking Addiction and GoodLife Eats Holiday Recipe Swap sponsored by Kerrygold.

Buttery Potato Rolls
5 teaspoons yeast
1 1/2 teaspoons salt
1/2 cup warm water
1 cup mashed potatoes
1 cup unsalted butter -- to 1 1/2 cup, divided use
1 cup milk
2/3 cup sugar
2 eggs
5 cups flour -- to 6 cups, to make stiff dough


Preheat oven to 350° F. Grease the cups of a 12-cup muffin tin (three if you have them).

In a small bowl, add yeast to warm water. Heat milk and 1/2 cup butter in microwave for 1 minute.

Pour milk/butter mixture into the work bowl of a heavy duty stand mixer. Add sugar and salt and mix on low. Add potatoes and eggs and mix to combine. Add yeast/water mixture.

Slowly incorporate flour, adding enough to make a stiff dough (usually 5-6 cups), switching to dough hook when it becomes necessary.

Flour a work board or clean countertop and dump dough into the center. Dough should be soft (like a pillow!) but slightly sticky. Divide into thirds. At this point, if you only have one muffin tin (like me!) then wrap the two 1/3 batch balls in plastic wrap (or a ziptop bag) that's been lightly sprayed with non-stick spray and park in the fridge until ready to bake. You can also freeze the dough at this point for later roll making. If using (from freezer) thaw overnight in the fridge. With either fridge or freezer dough allow to sit on the counter for 20-30 min. (while oven preheats) before continuing with instructions.

Soft, but slightly sticky, knead in extra flour if needed to keep it from sticking, but don't overwork the dough!

Divide each third into 12 equal sized pieces. Divide each of these pieces into three equal-sized balls (about the size of a walnut in it's shell).

Melt 1/2 cup butter in the microwave. Roll each ball into the melted butter then place three of these balls together into the well of the prepared muffin tin.

Ready to rise

Mmm! Buttery goodness!
Allow to rise 45 min or so until doubled in size.

The risen dough, ready for the oven
Bake at 350° until golden brown, 20-25 min. Cool for 5 min in the pan before removing to a wire rack to cool. Brush tops with more melted butter before serving. If not serving immediately, allow to cool and store in a zip top bag. When ready to serve, reheat in a warm oven then brush with melted butter.


Yield:
"36 cloverleaf rolls"


Monday, November 22, 2010

Mason/Dixon Dressing

Here's my entry for this week's Holiday Recipe Exchange with GoodLife Eats and My Baking Addiction...

Come join the fun at the My Baking Addiction and GoodLife Eats Holiday Recipe Swap sponsored by Swanson Broth


Mason/Dixon Dressing


This dressing combines a little of both the North and the South, celebrating tastes from both cultures. The addition of dried cranberries and apples give it a slightly sweet/savory combination that is wonderful with turkey, ham, chicken or even roast pork.

Ingredients:

  • 1 pan baked cornbread, crumbled
  • 1 bag Pepperidge Farms Herb Stuffing
  • 1 cup chopped dried cranberries
  • 1 cup chopped pecans
  • 2 tablespoons fresh finely chopped sage 
  • 1 tablespoon fresh thyme leaves
  • 1/2 teaspoon dried leaf marjoram
  • 1/2 teaspoon salt
  • 1/4 teaspoon ground black pepper
  • 1 pound pork sausage
  • 6 tablespoons butter
  • 2 cups chopped apple
  • 1 cup chopped onion
  • 1 cup chopped celery
  • 1 can Swanson's chicken broth
Preparation:
Combine the cornbread and herb stuffing in a large bowl. Add the sage, thyme, marjoram, salt, pepper, cranberries and pecans, tossing well to combine. (Disposable latex gloves are great here!) 
Preheat oven to 375°. Spray a 9x13" baking dish with non-stick spray and set aside.

Brown the sausage in a large skillet, crumbling as you cook until cooked through and no big lumps remain. Remove the sausage, drain and allow to cool slightly before adding to bread mixture. 

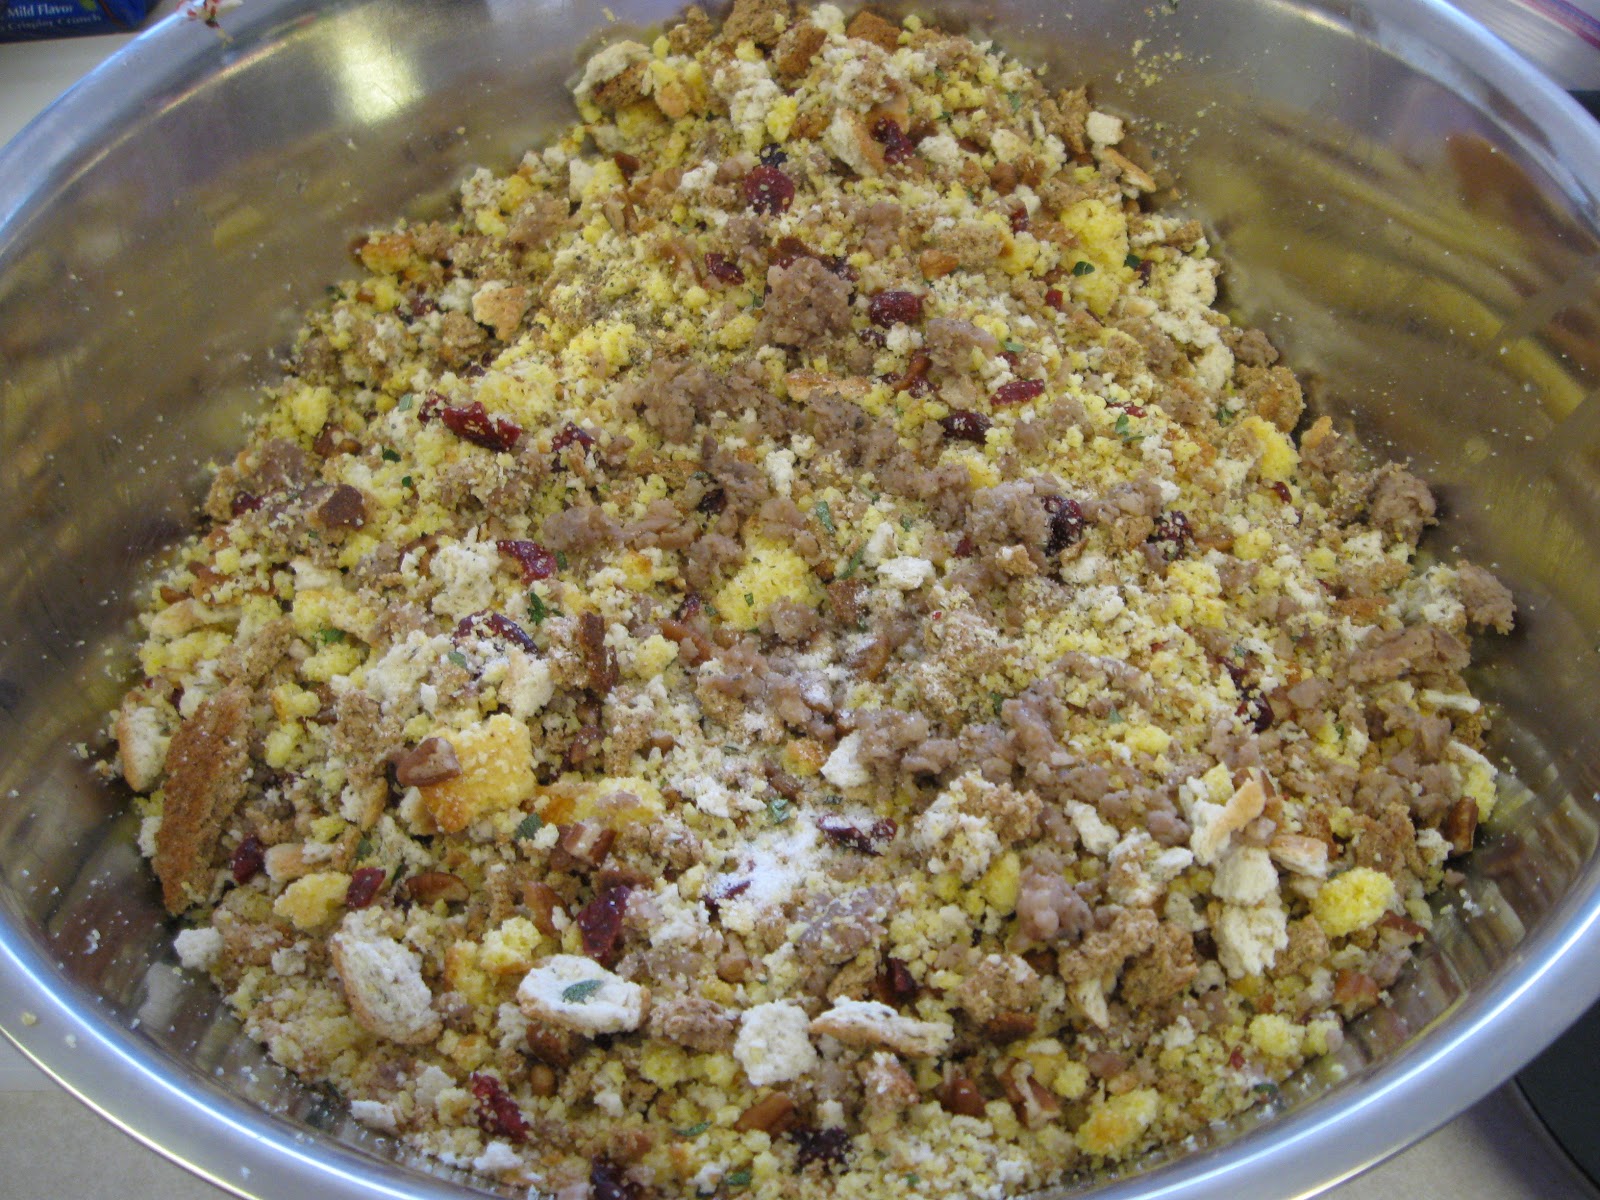
"Dry" ingredients with sausage added
Add butter to the skillet and allow to lightly brown before adding the apple, onion, and celery. Cook until softened, about 5 minutes. Stir this mixture into the bread and sausage mixture. Slowly add chicken broth, gently stirring or mixing with hands. Use only enough broth to make stuffing moist, not soggy. It should stick together when formed into a ball, but still be slightly crumbly. 

"Moistened" dressing

Texture of "moistened" dressing

Should form a ball when squeezed together but still be crumbly when not pressed
Ready to bake

Cover with foil and bake for about 30 minutes. Remove foil and bake for an additional 15 minutes to lightly brown top.

Ready to eat!


Serves 10-12.

This dressing also makes great stuffing muffins or "stuffins".  Instead of baking in a 9x13" dish, spray the cups of a muffin tin with non-stick spray and fill with dressing mix.  Bake for 20-30 min. and serve. Makes 18 "stuffins". 


This dressing freezes well too. Freeze before baking, then thaw overnight before baking as directed. If needed, add a little extra chicken broth...

Wednesday, November 17, 2010

Very Vanilla Scottish Shortbread with Vanilla Icing


Ok, so this week's Holiday Recipe Exchange ingredient is Vanilla...and I LOVE vanilla! I love to use it in all kinds of things and even find myself adding it to things that don't necessarily call for it. Part of my love of it is probably due to the fact that I make my own extract and love the pure taste of just vanilla in my extract.

If you've never made extract before, my recipe is super simple... just vanilla beans and vodka. I buy a big bottle of cheap vodka (usually the plastic bottle from the superstore) and buy a bunch of vanilla beans (at least 4, usually 6 for a big bottle). Split the beans down the length, then drop them whole into the bottle of vanilla. Put in the pantry for at least 6 weeks to "cure" and then use. I leave the beans in the bottle, but after it has reached your desired strength, you can remove them if you like. Now, homemade vanilla won't be as dark as imitation because there are no added colors or flavors like in the imitation, but the flavor is beyond wonderful... But this isn't my recipe for the exchange, so just take that as a little "extra" :)

For this week's exchange I decided I wanted to highlight the flavor of vanilla in it's pure form, not just incorporate it into something that might mask it's true nature. So, what better recipe than shortbread! Little more than flour, butter and sugar, vanilla makes an excellent addition to shortbread. So for this week's recipe exchange, I present

Very Vanilla Scottish Shortbread with Vanilla Icing

1 vanilla bean
1 cup granulated sugar
1 lbs unsalted butter plus 4 tbsp divided, at room temperature
1 egg, room temperature
5 cups all purpose flour
1/2 tsp table salt, divided
4 tbsp milk
1 cups conectioner's sugar
red and green food coloring


For shortbread:
Preheat oven to 350F. Take vanilla bean and slit down length. Using the back of a knife, scrape the seeds (also called "caviar") out of the pod and into the work bowl of a food processor.


Cut the remaining pod into 1-2 inch pieces and reserve the for drizzle. Add 1 cup granulated sugar to food processor and pulse 10 times for 10 seconds each to combine. This will accomplish two things: first, you will incorporate the vanilla seeds into your sugar and second, you will reduce the size of the sugar granules so they will mix into the butter better. You now have a quick "vanilla sugar".


Place 1 lb of softened butter into the bowl of a stand mixer. Cream for 30 seconds, then add vanilla sugar and cream for at least 2 minutes more or until light in color and fluffy.


Blend in egg and 1/4 tsp salt, then slowly incorporate flour, beating until JUST combined. Do not overmix or your shortbread will be tough! Pat out into an 11x7 bar pan (I like my medium stoneware bar pan from Pampered Chef for this) and score into bars with a knife.


Prick with a fork (also called "docking") and place in preheated oven. Bake at 350F for 15 min then reduce temperature to 200F. and continue to bake for 1 hr.


Meanwhile, begin preparing icing.

For icing:
Put 4 tbsp of butter and milk into a small microwavable bowl. Heat until butter melts and mixture is hot. Add reserved vanilla pod pieces and allow to steep for at least 10 minutes. Remove pod pieces and discard. Whisk in confectioner's sugar. Divide into two small bowls and add red coloring to one and green to the other. Cover tightly and set aside for final step. When cookies are baked, remove from oven and allow to cool at least 10 minutes in the pan before breaking apart on score marks and moving to a cooling rack.


Do not be a sillyhead like me and rush getting them out of the pan...or you'll end up with lots of broken pieces :)


Allow to cool completely. Once cool, place a small cookie sheet or sheet pan under cookies on cooling rack to catch excess icing. Using the tines of a fork, drizzle red then green icing over cookies. Allow to dry before storing in a sealed container.


Come join the fun at the My Baking Addiction and GoodLife Eats Holiday Recipe Swap sponsored by Beanilla!

Sunday, November 14, 2010

Holiday Recipe Exchange...


So Good Life Eats and My Baking Addiction are hosting a Holiday Recipe Exchange this year and I've decided to participate! This will be a weekly challenge featuring a key ingredient and we will then be requesting votes for our creations for one week. Details can be found at the link above if anyone's interested in participating. The fun all starts next week when the theme ingredient is VANILLA! As someone who makes their own extract, that's one ingredient that's definitely a favorite in this house. Making something that HIGHLIGHTS vanilla though isn't as easy... But I'll think of something I'm sure! For now I'll start planning and hope I can get some votes once my recipes go live :)


Wednesday, July 28, 2010

Homemade yogurt and granola

So in my quest to improve my own granola recipe, I discovered a recipe in the cookbook Cowgirl Cuisine by Paula Disbrowe for what she calls "Canyon Granola". Thought I'd give it a try and wanted to share my results with you! First, here's a link to the book on Amazon.com in case you've not seen it.

Paula and her husband live in Nueces Canyon, not far from here, on a ranch, having moved to Texas from New York to work at a bed and breakfast in the Hill Country. Like many I know they fell in love with the area and decided to stay. The cookbook is great! A combination of cookbook and commentary on ranch life and life in the Texas Hill Country. I've tried two recipes from the book so far, this one for "Canyon Granola" and another for a cookie called "Milk Chocolate Chip Oatmeal Cookies". I wasn't a big fan of the cookies, preferring my own chocolate chip recipe, but I may take a cue from her recipe and incorporate some cocoa nibs in my recipe in the future as a test... I plan to test one additional recipe tomorrow night for Texas greens and will post about that recipe later... But now for the granola!

As I said, I have my own personal granola recipe (which I will post at the end of this entry) that I tweak and play with occasionally and am always looking for ways to improve it, so I thought I'd try Paula's recipe from the book to see what I thought.  It is REALLY GOOD! Usually when I am testing a new recipe I try and maintain it to the original for the first go-round and then improvise on future use.  This one is really good as is, so I'd totally recommend using it as is! I also made some homemade crockpot yogurt using the recipe from Stephanie O'Dea's blog "A Year of Slow Cooking". It turned out really well and I will definitely be making it again and again! It will be a big money saver in this house I'm sure! :)

Unfortunately this blog post will be a little light on photos because I forgot to take a "before" picture of the ingredients...but suffice it to say that they are exactly as directed, except for the fruit addition. I was able to get a big bag of dried apricots and Sunmaid raisins from Sam's Club (I use the apricots for baby food in the crockpot) and so I decided to use those instead of the fruits called for in the recipe. I'm sure you could substitute your own favorite dried fruits as well...

The Recipe:

                     
* Exported from MasterCook *

                              Canyon Granola

Recipe By     :
Serving Size  : 0     Preparation Time :0:00
Categories    :

  Amount  Measure       Ingredient -- Preparation Method
--------  ------------  --------------------------------
  1                cup  maple syrup
     1/2           cup  dark brown sugar
     1/3           cup  canola oil
     3/4      teaspoon  salt
  1         tablespoon  vanilla extract
  4               cups  old-fashioned rolled oats
  4             ounces  pecan halves -- about 1 cup
  2             ounces  pepitas -- about 1/2 cup
  2             ounces  sunflower seeds -- about 1/2 cup
     1/2           cup  whole wheat flour
     1/2           cup  nonfat dry milk powder
     1/3           cup  ground flaxseed meal
  4             ounces  chopped dried peaches or nectarines -- generous 1/2 cup
  4             ounces  dried cherries or golden raisins -- generous 1/2 cup

Place the oven racks on the upper and lower thirds of the oven and preheat to 300F.

Combine the maple syrup, brown sugar, oil, and salt in a small saucepan over medium heat. Cook, stirring occasionally, until the brown sugar is dissolved. Stir in the vanilla.

In a large bowl, combine the oats, pecans, pepitas, sunflower seeds, flour, milk power, and flaxseed meal. Pour the warm syrup over the dry ingredients and use a rubber spatula to combine well.

Divide the moistened oats evenly between two baking sheets. Bake for 20 minutes, then stir with a metal spatula and rotate the sheets to opposite racks ot ensure even baking. Bake another 20 minutes, then stir and switch pans again. Bake until the mixture has a fragrant, toasty aroma, another 10 to 15 minutes. Cool the granola in the pans, breaking up any unwieldy clumps with a spatula. When the mixture is completely cool, mix in the dried peaches and cherries and store at room temperature in an airtight container.

Yield:
  "12 cups"
                                    - - - - - - - - - - - - - - - - - - -

My Results:

As I said, I try and follow the recipe exactly the first time I make it.  This time, however, I decided to make the "syrup" element in the microwave to cut down on the heat in the house (it is July in Texas after all!) I don't keep canola oil in the house, so I used vegetable oil instead and combined all the ingredients from step 2 in a 4 cup glass measure in the microwave. I then microwaved it for 2 minutes, stirred, then another 2 minutes. This was the perfect amount of time for my microwave, but YMMV depending on your microwave. I then stirred in the vanilla (my own homemade of course!).

I put all the dry ingredients into a large plastic bowl and, using latex-gloved hands, stirred them together. I then poured the syrup over top and used my hands to thoroughly mix it.  I would suggest waiting a little while for the syrup to cool a bit before doing this if you want to use your hands instead of the spatula suggested in the recipe (I didn't and it was HOT!) but think that using your hands gets a better mix than the spatula.

The recipe doesn't call for it so I didn't do it, but I think in the future I would suggest spraying the baking sheets with cooking spray before adding the granola.  It didn't stick BAD, but it did stick a bit when I went to stir it in the oven. I'd also very much recommend a RIMMED baking sheet since otherwise you'll have granola all over everywhere when you go to stir it! :)

I ended up over-baking mine a bit (at the end of the second 20 minutes I turned off the oven, cracked the door and left it in there because we were in the middle of eating dinner...) but even so, it's very, very good! I really like the maple flavoring and the use of the flaxseed meal instead of the whole seed that I use in my recipe. I also think that the whole wheat flour helps bind it a little better to the individual ingredients so may tinker with that in my own recipe. Here's a picture of my results:


Now, as I said, I have my own granola recipe that I love and give as gifts at Christmas and other times. I'm posting it here for those who will undoubtedly ask for it, but be aware that it makes a LARGE batch, so plan to scale it down if you don't want a big batch in your pantry!

                     
* Exported from MasterCook *

                           Honey Spice Granola

Recipe By     :
Serving Size  : 0     Preparation Time :0:00
Categories    :

  Amount  Measure       Ingredient -- Preparation Method
--------  ------------  --------------------------------
                        ***The Base***
  16              cups  old-fashioned rolled oats
     1/2           cup  oat bran -- (to 1 cup)
  1                cup  wheat germ -- (to 1.5 cups)
     3/4           cup  powdered milk
  1                cup  sesame seeds
  2               cups  chopped nuts -- (to 3 cups) pecans or walnuts preferred
     1/2           cup  flax seed
  2               cups  sunflower seeds -- shells removed
  2               cups  shredded coconut meat -- (to 3 cups) unsweetened
  2          teaspoons  salt
  2          teaspoons  cinnamon -- or to taste
     1/2      teaspoon  ground ginger -- optional; or diced candied ginger as add-in later
                        ***The Binder***
  1                cup  vegetable oil -- *see note
  1                cup  water
  1 1/2           cups  honey -- *see note
  1         tablespoon  vanilla extract
                        ***The Add-Ins***
  2               cups  dried fruit -- (to 4 cups); raisins, dates, dried apricots, craisins, etc.

Preheat oven to 300 degrees F. 

The Base:
All the base ingredients can be adjusted to suit your tastes. Add more of anything but subtract from something else to get a general total of 25-26 cups of dry ingredients. Mix all the base ingredients together in a very large bowl or several smaller bowls.

The Binder:
*Note: The oil can be your choice of oils or melted butter. I personally use 1/2 cup butter (melted) plus 1/2 cup vegetable oil, or if I have it on hand, 1/2 cup flax seed oil plus butter, but really as long as you have 1 cup total oil product, you're set.

*Note: The honey can also be adjusted to suit your taste and/or sweetener preference. Because of my no sugar diet, I now use 1 cup Splenda granular or Nature Sweet plus 1/2 cup sugar-free maple syrup or use 3/4 cup Steel's Sugar-Free Country Maple Syrup (thicker than regular sugar-free maple syrup) plus 3/4 cup Splenda or Nature Sweet.  But in the past I've used anything from brown sugar to maple syrup to honey to molasses to raw cane sugar.  All have had good results.  If you use ALL "dry" sweetener, you may need to add extra water to adjust.

Mix oil, water and sweetener of choice in a microwave-safe container and microwave on high for 30-45 seconds or until heated and combined.

Pour the binder mixture over the base ingredients and mix well with hands. Disposable gloves are wonderful here, or make sure to spray hands with non-stick cooking spray before mixing. Lots of kids love this "messy" part, so let them join in if you want :)

Divide all of this between four 9x13 pans or a couple large roaster pans. I usually invest in disposable turkey roasters for this as I don't like the cleanup, but if you would rather not do that, make sure to spray your pans well with non-stick spray before loading them up!  Bake at 300, stirring every 10-15 min, until golden brown, usually a total of 45 minutes.  Let cool.

If desired, once the granola has cooled, you can add dried fruit to it.  We personally prefer to leave the granola "plain" and then add dried or fresh fruit when eating because it gives more choices then...  This keeps well in an airtight container and also makes a great gift!

Description:
  "Makes a big batch which keeps a long time!"
                                    - - - - - - - - - - - - - - - - - - -

Can't wait to try the greens recipe tomorrow night and will be sure to post and let you know how it goes... I've not had much success with greens in the past, so am very hopeful...

TTFN!

Christi

Tuesday, June 29, 2010

A new cookbook and a new recipe test...

Well, it's been quite a while since I posted to the blog but I wanted to share this new test recipe with you from the new-to-me cookbook I received recently:


This cookbook is aimed at new moms, which I'm not at this point, but with the impending arrival of baby #2, I picked it up thinking it might help me prepare some meals ahead of time. This is the first recipe I've tried out of it, but if it's any indication, we'll definitely love this cookbook! Here is the recipe to start with:

               
* Exported from MasterCook *

                            Djion Cauliflower

Recipe By     :
Serving Size  : 6     Preparation Time :0:00
Categories    :

  Amount  Measure       Ingredient -- Preparation Method
--------  ------------  --------------------------------
  20            ounces  frozen cauliflower -- defrosted
     3/4           cup  grated parmesan cheese
     1/2           cup  mayonnaise -- or salad dressing
  1         tablespoon  lemon juice
  2        tablespoons  dijon mustard
  1         tablespoon  dried parsley

Preheat oven to 375 degrees.

Cook cauliflower according to package directions, omitting salt. Drain and set aside.

Coat a 2-quart baking dish with cooking spray. Add the cauliflower.

In a medium mixing bowl, combine the remaining ingredients, stirring well to mix. Spread the mixture evenly over the cauliflower.

Bake for 15 minutes or until lightly browned.

Description:
  "This is an elegant way to serve cauliflower. Try substituting grainy mustard for a slightly different flavor and texture."
                                    - - - - - - - - - - - - - - - - - - -

Per Serving (excluding unknown items): 205 Calories; 19g Fat (78.2% calories from fat); 7g Protein; 5g Carbohydrate; 2g Dietary Fiber; 14mg Cholesterol; 377mg Sodium.  Exchanges: 0 Grain(Starch); 1/2 Lean Meat; 1 Vegetable; 0 Fruit; 1 1/2 Fat; 0 Other Carbohydrates.

NOTES : I mixed the cauliflower and sauce together instead of spreading over top for better distribution...

And here is a photo of my ingredients before I started:


Next, I mixed up the sauce, which looked like this:


And then mixed it with the pre-cooked cauliflower:


And here is the final dish:


I have to say, this is probably the best cauliflower dish I've had in a long time... YUMMY! It isn't quite as good as fresh roasted cauliflower when it comes health quotient, but if you want a fancier, saucy cauliflower dish for company, this one is great! Definitely will be having this one again!
 

Cookbooks 365 Template by Ipietoon Cute Blog Design