Showing posts with label holiday recipe exchange. Show all posts

Wednesday, December 15, 2010

Dirty Snowballs

Dirty Snowballs


If you've been reading this blog, you know that I've been playing along with GoodLife Eats and My Baking Addiction's Holiday Recipe Exchange. This week there were two chances to play with two different themes. The first theme, Comfort Food, I blogged about my macaroni and cheese recipe. The second theme this week is a repeat of a previous theme...BUTTER!  

Now, those of you who know me personally know we do not keep margarine in our home. We ONLY use butter, and yes, we keep BOTH kinds (salted and unsalted) on hand. The only time I really use salted butter though is for eating straight up, like for bread and butter, or for using on things like grilled cheese sandwiches, waffles, etc. The rest of the time I use unsalted. In my way of thinking, I can always add salt to a recipe, but I can't take it out :) 

So for this round of the BUTTER theme, I decided to go with a dessert since that is my favorite thing to cook :) Last BUTTER round you may recall, I shared my recipe for Buttery Potato Rolls. This time I'm sharing a brand new recipe, fresh from my kitchen, which combines the best of two of my favorite kinds of holiday cookies...meltaways and Mexican Wedding Cookies (sometimes called Russian Tea Cakes). This recipe has the tender, flakiness of the meltaway with the nutty goodness of the wedding cookie. Add to that the yummy taste of a hot butter rum and you've got a winner! In thinking of a name for these cookies, I came up with Dirty Snowballs.  They reminded me of when I was a kid and you'd get some sand in your snowball when the snow wasn't real deep... thus, Dirty Snowballs.  They turned out better than I had hoped and I certainly hope some of you will give them a try.  

Now, if you're a dough-eater like me, please don't be disappointed when you taste the dough... It is NOT a sweet dough and it DOES have a strong rum/alcohol taste when raw, but when the dough is baked off and rolled in powdered sugar, these cookies are light, flaky, melt-in-your-mouth, balls of goodness! So give them a shot! You won't be disappointed!


Come join the fun at the My Baking Addiction and GoodLife Eats Holiday Recipe Swap sponsored by Kerrygold.

Dirty Snowballs
Recipe By     : Christi Brogan

1 1/2 cups all-purpose flour
2 tablespoons all-purpose flour
1/2 cup pecans -- or use pecan meal
2 tablespoons cornstarch
2 teaspoons ground cinnamon
2 teaspoons freshly grated nutmeg
1/4 teaspoon ground cloves
3/4 teaspoon coarse salt
3/4 cup unsalted butter -- (1 1/2 sticks)
1 cup confectioners' sugar -- divided
1/4 cup spiced rum -- like Captain Morgan
2 teaspoons pure vanilla extract


Using a food processor, chop the pecans until very fine, almost a pecan meal consistency.

Consistency of pecans after chopping

Combine flour, pecans, cornstarch and spices in a bowl. Place 1/3 cup of the confectioners sugar and the butter in the workbowl of an electric mixer. Beat on medium speed until light and fluffy, 2-3 minutes. Reduce speed to low, and gradually mix in flour mixture. Add the rum and vanilla and beat to throughly combine.

Chill dough in freezer for 30 minutes to re-harden the butter.

Dough ready for the freezer

Preheat oven to 350 degrees. Make balls of the dough approximately 1 tbsp in size and  place each 1" apart on parchment-lined baking sheets. Bake until just golden, about 15 minutes.

Lightly golden in color


Transfer cookies to wire racks; let cool 10 minutes. Gently toss warm cookies with remaining 2/3 cup sugar in a resealable plastic bag. Cookies can be refrigerated in airtight containers up to 2 weeks.


A Dirty Snowball
Crumbly, sweet and flaky - YUM!
Yield:
  "2 1/2 dozen"

Tuesday, December 14, 2010

Comfort Food Extreme: Homemade 5-cheese Mac n Cheese


Homemade Five Cheese Mac 'n Cheese


 So here we are with the SIXTH entry in GoodLife Eats and My Baking Addiction's Holiday Recipe Exchange... And this week the theme is comfort foodCome join the fun at the My Baking Addiction and GoodLife Eats Holiday Recipe Swap sponsored by Le Creuset.


In my world, nothing says comfort food like a hot bowl of homemade macaroni and cheese, with a nice crunchy top crust and noodles that aren't overcooked nor undercooked but JUST right. There are lots of recipes out there for macaroni and cheese and lots of ways to dress up the basic mac, but in my opinion, nothing says comfort like the traditional mac and cheese that I love to make for my family. My little girl absolutely gobbles it down. In fact, it's her most requested meal. I use five different types of cheese in my mac n cheese, the fifth one only appearing in the topping. You can use the five types I've listed here, which are my basic go-to cheese choices, or you can change out any of them for cheeses of your choice. I oft-times find myself short on one or more of these and use what I have on hand. I only have two pieces of advice when it comes to swapping out cheeses. First, make sure they melt! Don't choose a cheese like feta or queso fresco which don't melt well. And second, if choosing a stronger flavored cheese like a blue, use half the amount of that cheese and up the amounts of the other cheeses to keep it from overpowering the dish. Other than that, swap away!  Here's the basic recipe:

Christi's Homemade Baked Five-Cheese Mac 'n Cheese


1 1/2 pounds elbow macaroni -- cooked to al dente
1/2 large sweet onion -- diced
1/2 cup butter
1/2 cup flour
1/4 teaspoon Hungarian paprika -- sweet
1/4 teaspoon mustard powder -- Coleman's brand preferred
1/4 teaspoon fresh ground black pepper
1/2 teaspoon salt
4 cups whole milk -- can use 1-2% but whole makes it richer
4 ounces sharp cheddar cheese -- grated
4 ounces medium cheddar cheese -- grated
4 ounces Swiss cheese -- grated
4 ounces Velveeta -- diced
1/4 cup bread crumbs -- for topping
1/4 cup freshly grated parmesan -- for topping

If your pasta is not cooked, start your water boiling now and your pasta and sauce will be ready at about the same time. Cook your pasta for 1 minute less than you normally do as it will bake and soften a bit more in the cheese sauce in the oven.

Preheat oven to 350 F. Grate the cheddar and swiss cheeses on the large side of your box grater. Cut the velveeta into 1" cubes. 


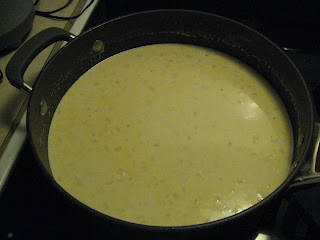
Melt butter over medium heat. Add onion and saute until starting to turn golden. Mix flour with spices. Add flour mix, whisking to form a roux.  Will be clumpy/thick.  Cook for 2-3 minutes or until it smooths out and starts to smell a little nutty. Add milk, 1 cup at a time, whisking to incorporate throughly before adding more. 


Let this come just to a boil, then turn heat down to medium low and add cheeses slowly making sure to melt each addition before adding more. Add velveeta last to help smooth it all out. Combine cheese sauce mix with cooked macaroni noodles. Spray a large casserole dish with cooking spray (helps clean up later!) then dump in mac n cheese. Top with bread crumbs and shredded parmesan cheese. 


Bake at 350 for 30 minutes or until hot and bubbly throughout.  


This makes a large batch, perfect for freezing. I serve some for dinner, then package remainder in "meal sized" portions in the freezer for later use. Or you can also be really bad and try out Alton Brown's Next Day Mac and Cheese "Toast"...  To reheat thawed mac n cheese, bake at 350 until heated through. 

YUM!!!


Wednesday, December 8, 2010

Mexican Hot Chocolate Cookies

 
And now for the next entry in the Holiday Recipe Exchange with GoodLife Eats and My Baking Addiction... This week I decided to go the easy route and start with a recipe from a fairly reliable source... Martha Stewart! I know Martha gives some folks the frights, but I've found her recipes to usually be worth repeating... This one in particular I've tried in the past and found them absolutely addicting, so I decided I'd share my take on her recipe for Mexican Hot-Chocolate Cookies. This cookie is like a cross between a snickerdoodle (owing to the cream of tartar) and a cup of hot chocolate with a little bit of chile heat added in for fun. They come out of the oven slightly crispy but still chewy and wonderful! If you enjoy this recipe, then come join the fun at the My Baking Addiction and GoodLife Eats Holiday Recipe Swap sponsored by Scharffen Berger.


Santa would LOVE a plate of these cookies!
Mexican Hot-Chocolate Cookies

Original recipe source: Martha Stewart.com
Adaptations by me!

2 1/4 cups all-purpose flour
1/2 cup unsweetened cocoa powder (the darker the better)
2 teaspoons cream of tartar
1 teaspoon baking soda
1/2 teaspoon coarse salt
1 cup unsalted butter -- (2 sticks) room temperature
1 3/4 cups sugar, divided
2 large eggs, at room temperature
1/2 tsp vanilla extract (homemade if possible!)
2 teaspoons cinnamon
1/2 tsp freshly ground ancho chile


Preheat oven to 400 degrees. Line two cookie sheets with parchment paper and set aside.  

Pepper prep: Take your ancho chile pod and break it open, removing all the seeds and the stem. Place the flesh of the chile in your food processor or, if you're like me and have a dedicated "spice grinder" (aka coffee bean grinder that's been re-purposed for spices), use that. Just be sure you don't use your regular coffee grinder for this or you're next cuppa joe may be on fire! Grind the pepper until it's in powder form. If, like me, your pepper is a little too soft (ie. not dry enough) grind enough for this recipe and then let the rest dry out for another use. Put 1/2 tsp of this freshly ground pepper in a small bowl for later use in this recipe.

Freshly ground ancho chile

In the bowl of your stand mixer, beat butter and 1 1/2 cups sugar on medium speed until light and fluffy, about 3 minutes.

Well creamed butter and sugar takes time...don't underbeat it!
Scrape down side of bowl. Add eggs, one at a time, and beat to combine. With mixer on low,
add the cream of tartar, salt and baking soda, allowing each ingredient to incorporate before adding the next. Add cocoa powder next followed by the flour in small increments (so you don't wear it!)

Dough's ready to go!
In the small bowl with your freshly ground ancho powder, add remaining 1/4 cup sugar and the cinnamon. 

The rolling mixture
 
Using heaping tablespoons (I used a #40 cookie scoop which is about 1.5 tbsp), form balls of dough and roll in chile-cinnamon-sugar mixture. Place, about 3 inches apart, on baking sheets. 

Ready to bake
Bake until cookies are set in center and begin to crack, about 10 minutes. Let cookies cool on sheets on wire racks 5 minutes, then transfer cookies to racks to cool completely. 


Nicely crackled but still chewy

Enjoy this recipe and let me know if you give it a whirl! I love to get comments from readers who've tried them!

Wednesday, November 24, 2010

Buttery Potato Rolls

Ok, so here's the next installment of the Holiday Recipe Exchange recipes... Today, hot, buttery, potato rolls! This recipe is based on one that's been used in my family for many many years. It utilized leftover mashed potatoes and is just delicious. I usually keep some "instant" mashed potatoes in the pantry for just this purpose (well, this and my husband's great-grandmother's doughnut recipe!) 

This is a very versatile recipe which can be made into any shape from Parkerhouse to crescents to hamburger buns. It's also great with other things added either to the dough itself (like fresh herbs) or on top (think parmesan cheese, italian seasoning, etc.) Enjoy!


Come join the fun at the My Baking Addiction and GoodLife Eats Holiday Recipe Swap sponsored by Kerrygold.

Buttery Potato Rolls
5 teaspoons yeast
1 1/2 teaspoons salt
1/2 cup warm water
1 cup mashed potatoes
1 cup unsalted butter -- to 1 1/2 cup, divided use
1 cup milk
2/3 cup sugar
2 eggs
5 cups flour -- to 6 cups, to make stiff dough


Preheat oven to 350° F. Grease the cups of a 12-cup muffin tin (three if you have them).

In a small bowl, add yeast to warm water. Heat milk and 1/2 cup butter in microwave for 1 minute.

Pour milk/butter mixture into the work bowl of a heavy duty stand mixer. Add sugar and salt and mix on low. Add potatoes and eggs and mix to combine. Add yeast/water mixture.

Slowly incorporate flour, adding enough to make a stiff dough (usually 5-6 cups), switching to dough hook when it becomes necessary.

Flour a work board or clean countertop and dump dough into the center. Dough should be soft (like a pillow!) but slightly sticky. Divide into thirds. At this point, if you only have one muffin tin (like me!) then wrap the two 1/3 batch balls in plastic wrap (or a ziptop bag) that's been lightly sprayed with non-stick spray and park in the fridge until ready to bake. You can also freeze the dough at this point for later roll making. If using (from freezer) thaw overnight in the fridge. With either fridge or freezer dough allow to sit on the counter for 20-30 min. (while oven preheats) before continuing with instructions.

Soft, but slightly sticky, knead in extra flour if needed to keep it from sticking, but don't overwork the dough!

Divide each third into 12 equal sized pieces. Divide each of these pieces into three equal-sized balls (about the size of a walnut in it's shell).

Melt 1/2 cup butter in the microwave. Roll each ball into the melted butter then place three of these balls together into the well of the prepared muffin tin.

Ready to rise

Mmm! Buttery goodness!
Allow to rise 45 min or so until doubled in size.

The risen dough, ready for the oven
Bake at 350° until golden brown, 20-25 min. Cool for 5 min in the pan before removing to a wire rack to cool. Brush tops with more melted butter before serving. If not serving immediately, allow to cool and store in a zip top bag. When ready to serve, reheat in a warm oven then brush with melted butter.


Yield:
"36 cloverleaf rolls"


Monday, November 22, 2010

Mason/Dixon Dressing

Here's my entry for this week's Holiday Recipe Exchange with GoodLife Eats and My Baking Addiction...

Come join the fun at the My Baking Addiction and GoodLife Eats Holiday Recipe Swap sponsored by Swanson Broth


Mason/Dixon Dressing


This dressing combines a little of both the North and the South, celebrating tastes from both cultures. The addition of dried cranberries and apples give it a slightly sweet/savory combination that is wonderful with turkey, ham, chicken or even roast pork.

Ingredients:

  • 1 pan baked cornbread, crumbled
  • 1 bag Pepperidge Farms Herb Stuffing
  • 1 cup chopped dried cranberries
  • 1 cup chopped pecans
  • 2 tablespoons fresh finely chopped sage 
  • 1 tablespoon fresh thyme leaves
  • 1/2 teaspoon dried leaf marjoram
  • 1/2 teaspoon salt
  • 1/4 teaspoon ground black pepper
  • 1 pound pork sausage
  • 6 tablespoons butter
  • 2 cups chopped apple
  • 1 cup chopped onion
  • 1 cup chopped celery
  • 1 can Swanson's chicken broth
Preparation:
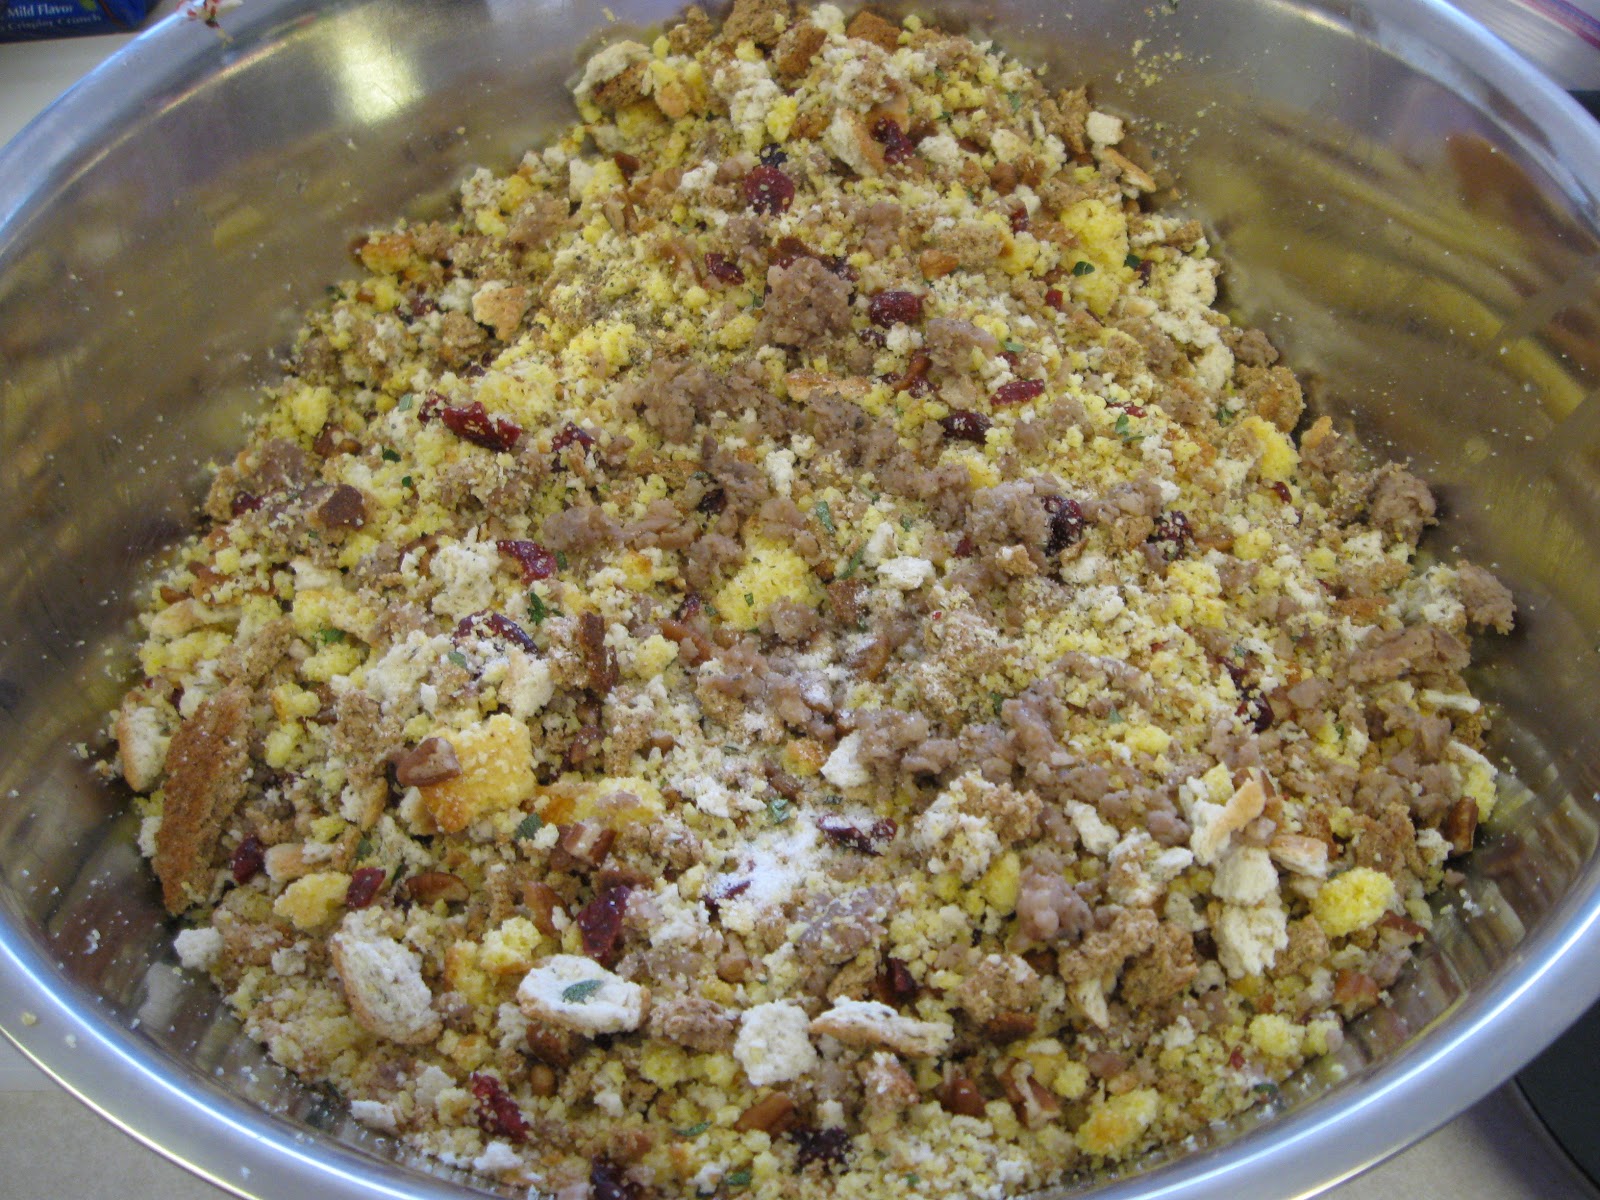
Combine the cornbread and herb stuffing in a large bowl. Add the sage, thyme, marjoram, salt, pepper, cranberries and pecans, tossing well to combine. (Disposable latex gloves are great here!) 
Preheat oven to 375°. Spray a 9x13" baking dish with non-stick spray and set aside.

Brown the sausage in a large skillet, crumbling as you cook until cooked through and no big lumps remain. Remove the sausage, drain and allow to cool slightly before adding to bread mixture. 

"Dry" ingredients with sausage added
Add butter to the skillet and allow to lightly brown before adding the apple, onion, and celery. Cook until softened, about 5 minutes. Stir this mixture into the bread and sausage mixture. Slowly add chicken broth, gently stirring or mixing with hands. Use only enough broth to make stuffing moist, not soggy. It should stick together when formed into a ball, but still be slightly crumbly. 

"Moistened" dressing

Texture of "moistened" dressing

Should form a ball when squeezed together but still be crumbly when not pressed
Ready to bake

Cover with foil and bake for about 30 minutes. Remove foil and bake for an additional 15 minutes to lightly brown top.

Ready to eat!


Serves 10-12.

This dressing also makes great stuffing muffins or "stuffins".  Instead of baking in a 9x13" dish, spray the cups of a muffin tin with non-stick spray and fill with dressing mix.  Bake for 20-30 min. and serve. Makes 18 "stuffins". 


This dressing freezes well too. Freeze before baking, then thaw overnight before baking as directed. If needed, add a little extra chicken broth...

Wednesday, November 17, 2010

Very Vanilla Scottish Shortbread with Vanilla Icing


Ok, so this week's Holiday Recipe Exchange ingredient is Vanilla...and I LOVE vanilla! I love to use it in all kinds of things and even find myself adding it to things that don't necessarily call for it. Part of my love of it is probably due to the fact that I make my own extract and love the pure taste of just vanilla in my extract.

If you've never made extract before, my recipe is super simple... just vanilla beans and vodka. I buy a big bottle of cheap vodka (usually the plastic bottle from the superstore) and buy a bunch of vanilla beans (at least 4, usually 6 for a big bottle). Split the beans down the length, then drop them whole into the bottle of vanilla. Put in the pantry for at least 6 weeks to "cure" and then use. I leave the beans in the bottle, but after it has reached your desired strength, you can remove them if you like. Now, homemade vanilla won't be as dark as imitation because there are no added colors or flavors like in the imitation, but the flavor is beyond wonderful... But this isn't my recipe for the exchange, so just take that as a little "extra" :)

For this week's exchange I decided I wanted to highlight the flavor of vanilla in it's pure form, not just incorporate it into something that might mask it's true nature. So, what better recipe than shortbread! Little more than flour, butter and sugar, vanilla makes an excellent addition to shortbread. So for this week's recipe exchange, I present

Very Vanilla Scottish Shortbread with Vanilla Icing

1 vanilla bean
1 cup granulated sugar
1 lbs unsalted butter plus 4 tbsp divided, at room temperature
1 egg, room temperature
5 cups all purpose flour
1/2 tsp table salt, divided
4 tbsp milk
1 cups conectioner's sugar
red and green food coloring


For shortbread:
Preheat oven to 350F. Take vanilla bean and slit down length. Using the back of a knife, scrape the seeds (also called "caviar") out of the pod and into the work bowl of a food processor.


Cut the remaining pod into 1-2 inch pieces and reserve the for drizzle. Add 1 cup granulated sugar to food processor and pulse 10 times for 10 seconds each to combine. This will accomplish two things: first, you will incorporate the vanilla seeds into your sugar and second, you will reduce the size of the sugar granules so they will mix into the butter better. You now have a quick "vanilla sugar".


Place 1 lb of softened butter into the bowl of a stand mixer. Cream for 30 seconds, then add vanilla sugar and cream for at least 2 minutes more or until light in color and fluffy.


Blend in egg and 1/4 tsp salt, then slowly incorporate flour, beating until JUST combined. Do not overmix or your shortbread will be tough! Pat out into an 11x7 bar pan (I like my medium stoneware bar pan from Pampered Chef for this) and score into bars with a knife.


Prick with a fork (also called "docking") and place in preheated oven. Bake at 350F for 15 min then reduce temperature to 200F. and continue to bake for 1 hr.


Meanwhile, begin preparing icing.

For icing:
Put 4 tbsp of butter and milk into a small microwavable bowl. Heat until butter melts and mixture is hot. Add reserved vanilla pod pieces and allow to steep for at least 10 minutes. Remove pod pieces and discard. Whisk in confectioner's sugar. Divide into two small bowls and add red coloring to one and green to the other. Cover tightly and set aside for final step. When cookies are baked, remove from oven and allow to cool at least 10 minutes in the pan before breaking apart on score marks and moving to a cooling rack.


Do not be a sillyhead like me and rush getting them out of the pan...or you'll end up with lots of broken pieces :)


Allow to cool completely. Once cool, place a small cookie sheet or sheet pan under cookies on cooling rack to catch excess icing. Using the tines of a fork, drizzle red then green icing over cookies. Allow to dry before storing in a sealed container.


Come join the fun at the My Baking Addiction and GoodLife Eats Holiday Recipe Swap sponsored by Beanilla!


Cookbooks 365 Template by Ipietoon Cute Blog Design